The great thing about having a DSLR or mirrorless camera is that it offers so many more functions and capabilities than your mobile phone or point-and-shoot camera…
If you’ve ever tried capturing a fast-moving subject, you know that motion blur can sometimes ruin the shot. That’s where Shutter Priority mode comes in. This semi-automatic setting gives you control over your camera’s shutter speed while letting the camera handle the rest. By adjusting how long your shutter stays open, you can freeze action with a fast shutter speed or create artistic motion blur with a slower one.
Shutter Priority mode is an excellent tool if you want more creative control without going fully manual. Whether you’re shooting sports, wildlife, or even light trails at night, understanding how to use this mode effectively can help you nail the perfect shot. In this article, I’ll explore how Shutter Priority mode works and give you tips for getting the best results in different shooting scenarios.
Table of Contents
Shutter Speed Defined
First, we need to quickly review shutter speed…
As Apalapse explains in the video above, shutter speed refers to the amount of time a camera’s sensor is exposed to light. Once the shutter is open, light hits the sensor, which creates the photo. Naturally, a faster shutter speed means the sensor is exposed to light for less time, which limits the amount of light that hits the sensor.
Conversely, a slow shutter speed lengthens the time the sensor is exposed to light, thus maximizing the amount of light that hits the sensor. Not only does camera shutter speed determine how long the sensor is exposed to light (and thus how dark or bright the resulting image is), but it’s also responsible for how movement appears in your images.

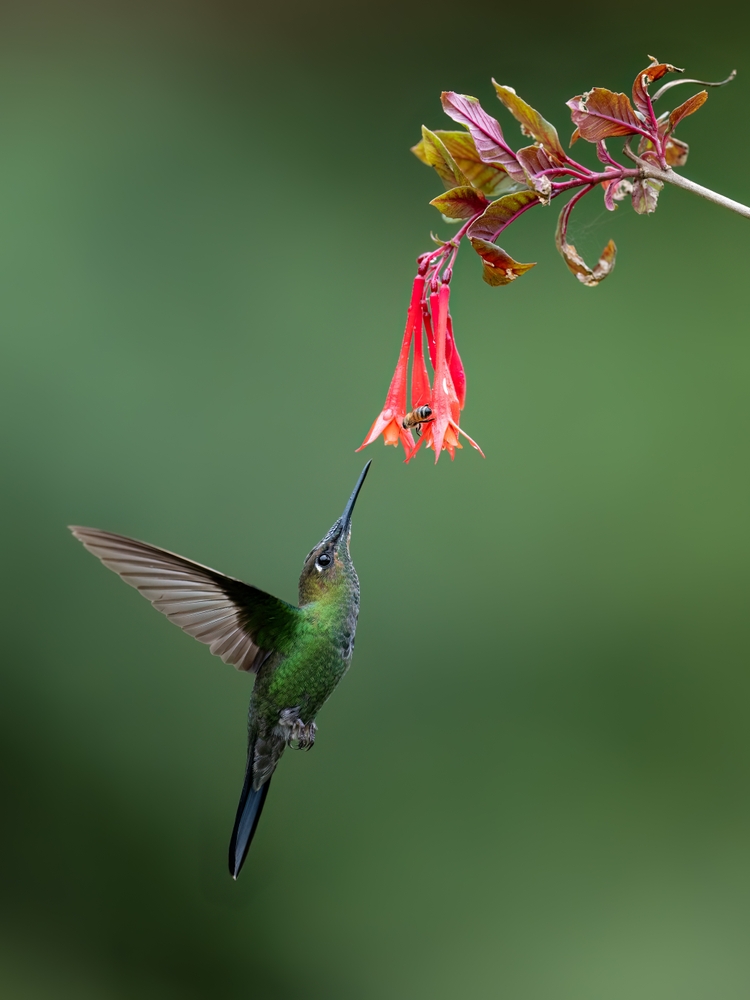
Photo by FotoRequest via Shutterstock
For example, a fast shutter speed allows you to freeze the movement of a moving subject, like the bird flying in the photo above.
A “fast” shutter speed is relative, however. Where one might need to use a shutter speed of 1/500 seconds to freeze the movement of an eagle soaring in the sky, a shutter speed of 1/100 seconds might be sufficient for freezing the movement of a person walking at a normal pace.

Photo by Efirso via Shutterstock
A slow shutter, on the other hand, allows you to blur the movement of a subject, like the water in the image above.
Again, the point at which a shutter is slow enough to blur movement depends on the speed of the subject, so determining what shutter speed to use (at least initially) is somewhat of a trial-and-error situation.
Fortunately, most cameras have a range of shutter speeds from about 1/30 seconds on the slow end to 1/4000 seconds on the high end to accommodate the majority of subjects you might want to photograph.
Introducing Shutter Priority Mode

Photo by TungCheung via Shutterstock
Shutter priority mode is indicated as TV or S on your camera’s dial.
When shooting in shutter priority mode, you get to determine the shutter speed and the ISO the camera uses to capture an image. Meanwhile, the camera determines an aperture that works with the settings you’ve identified in order to get a good exposure.
That means that shutter priority mode is a semi-automatic mode – you and the camera work together to get the right exposure.
Think of this as a go-between from full automatic mode, in which the camera has all the control, and full manual mode, in which you have to determine all of these settings.
That’s not just handy for helping you ease into taking more control over your camera. It’s also handy for situations in which you need to be faster about changing the camera settings.

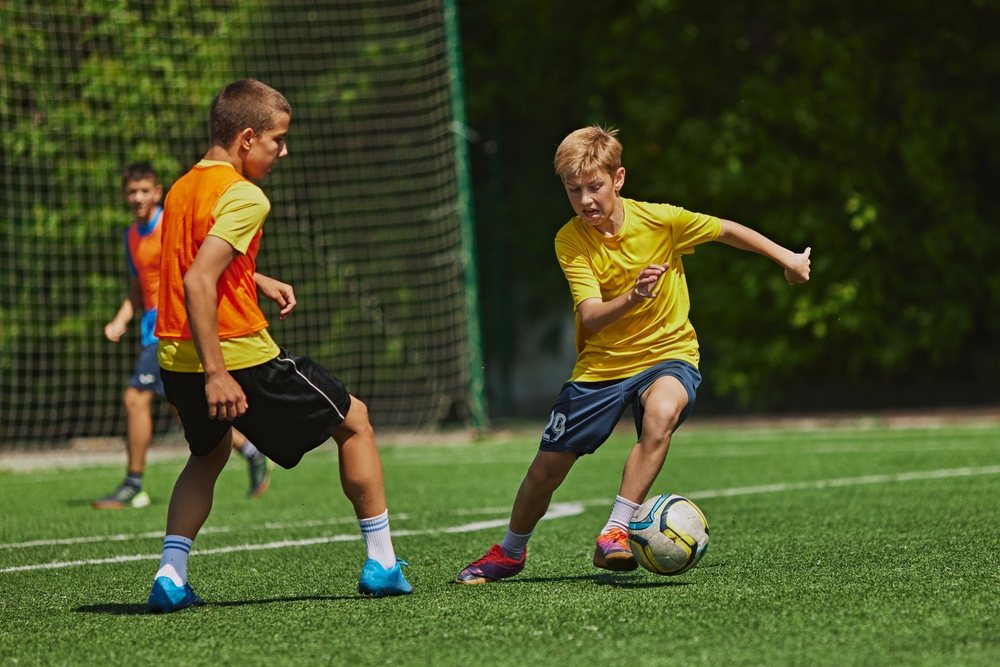
Photo by Master1305 via Shutterstock
For example, if you’re photographing your child’s soccer game and want to freeze the action as they play, shutter priority mode allows you to focus primarily on one setting – the shutter speed – without having to worry about aperture or ISO.
This is especially true if you’re shooting under typical lighting conditions and there’s plenty of light that the camera can collect. Of course, you won’t always be shooting in ideal lighting conditions and might find that there are times in which there isn’t enough light in the scene. When that happens, you might find that your camera doesn’t work in shutter priority mode.
But the beauty of shutter priority mode is that if the lighting is a bit too dark and your images are underexposed, you also have control over ISO, which allows you to increase the sensitivity of the camera’s sensor to light.
By increasing the ISO, the image will brighten up, and your camera will have enough light to get a good exposure.
Bonus Tips

Photo by Olga Rincon Castellanos via Shutterstock
As we’ve discussed, shutter priority mode makes it a little easier to get a good exposure while also helping you save some time when it comes to making adjustments to your camera settings.
However, it isn’t foolproof.
For example, if you’re shooting in exceedingly dark conditions, like photographing the night sky as seen above, you might have to make additional adjustments to ensure that your camera gets enough light. This might mean shooting in Bulb Mode, which allows you to extend the shutter speed beyond the normal 30-second maximum shutter speed on most cameras. That’s because, with so little light, your camera might not be able to get a good exposure, even if it selects the largest aperture possible.
And because you don’t want to use a high ISO (which introduces noise into the shot), the only other option is to extend the shutter speed…

Photo by oneinchpunch via Shutterstock
What’s more, since the camera sets the aperture, be aware that depending on the situation, you might be dealing with a very shallow depth of field.
For example, if the scene is dark and you’ve selected a marginally fast shutter speed like 1/200 seconds, the camera will select a very large aperture to collect enough light for a good exposure.
Since aperture is one of the factors that influence depth of field, you might find that your subject or other elements of the shot are out of focus, as seen above.
To get around this, you could use a higher ISO or use exposure compensation to force the camera into using an aperture that gets you a better depth of field.

Photo by Jaromir Chalabala via Shutterstock
Lastly, if you’re using a slow shutter speed – anything slower than about 1/60 seconds, you’ll need to mount your camera to a tripod.
The slower the shutter, the more vulnerable the camera is to camera shake, which results in blurry images. So, if you’re slowing things down, be sure to have a tripod handy!
Give Shutter Priority Mode a Try

Photo by Apollofoto via Shutterstock
In the end, shutter priority mode is a great learning tool that can help you get better-exposed images, but without being responsible for all the camera’s exposure settings.
Likewise, it’s an ideal setting for situations in which you want to control how motion appears in your shot.
Armed with that information, it’s time to grab your camera, put it in S or TV mode, and start getting familiar with shutter priority!
Friendly disclaimer: Our articles may contain affiliate links that support us without costing you more, and sometimes we spice things up with sponsored content—but only for products we truly stand behind!
Learn More:
Hero photo by Sergey Novikov via Shutterstock

