

Photo by Olezzo via Shutterstock
When you’re just starting out in photography, shooting in full auto mode has its advantages. Primarily, you can focus on developing your creative eye without having to worry about the camera settings.
Of course, at some point, understanding how to control the camera settings yourself opens up many other creative possibilities while also allowing for the control required to create improved images. Moving from full auto to manual mode can be scary, though, so it’s understandable if you’re hesitant to do so.
However, this guide helps you learn manual mode quickly and easily!
In the video above, I break down the essentials of manual mode in just seven minutes. It’s a quick video, but one that’s full of information.
Below is a play-by-play of the video in case you’d like a written transcript of what you watch. There are also all sorts of resources in the video description to provide even more information as you take control over your camera.
Let’s get started!
Table of Contents
- How to Shoot in Manual Mode: Learn the Exposure Triangle
- How to Shoot in Manual Mode: Understanding Aperture
- How to Shoot in Manual Mode: Understanding Shutter Speed
- How to Shoot in Manual Mode: Understanding ISO
- Practice, Practice, Practice!
How to Shoot in Manual Mode: Learn The Exposure Triangle
Before we dive into the specifics of aperture, shutter speed, and ISO, let’s talk about the exposure triangle…
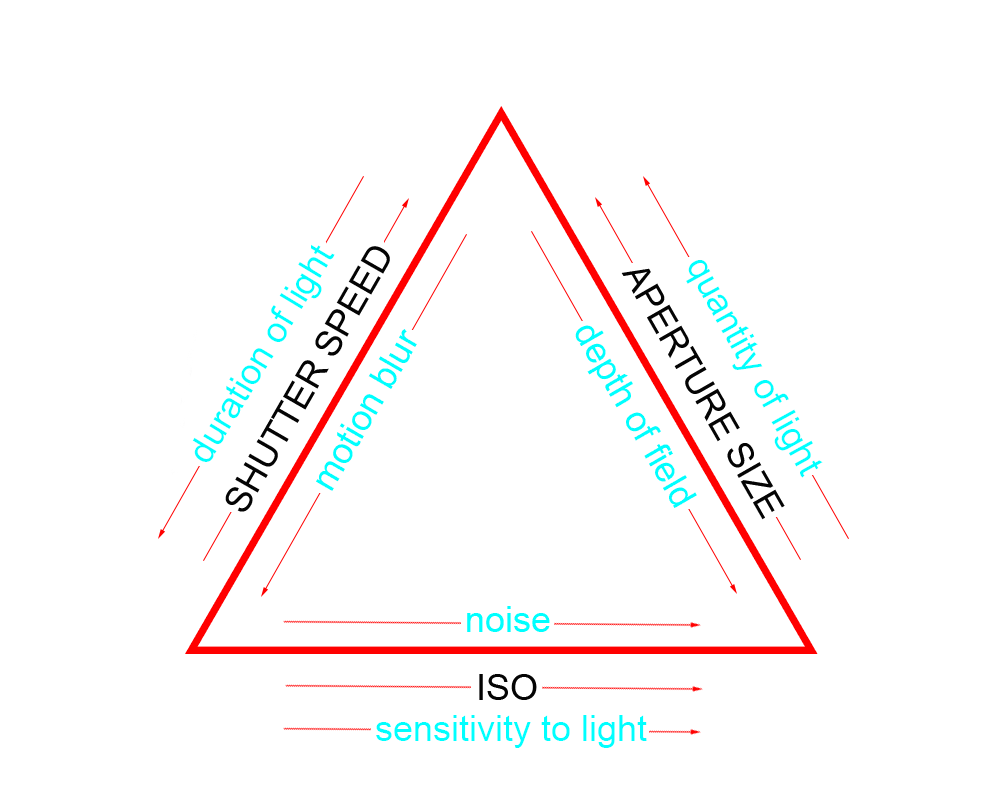
The exposure triangle is a graphic representation of the relationship between these three elements and how they affect the exposure of your photo. As you can see in the graphic above, aperture controls the quanitity of light that enters the camera, shutter speed controls the duration of the exposure, and ISO controls the sensitivity of the camera’s sensor.
In order to get a properly exposed photo, you need to balance these three elements. It’s important to note that changing one element will affect the others, so it’s necessary to keep that in mind when making adjustments.
How to Shoot in Manual Mode: Understanding Aperture
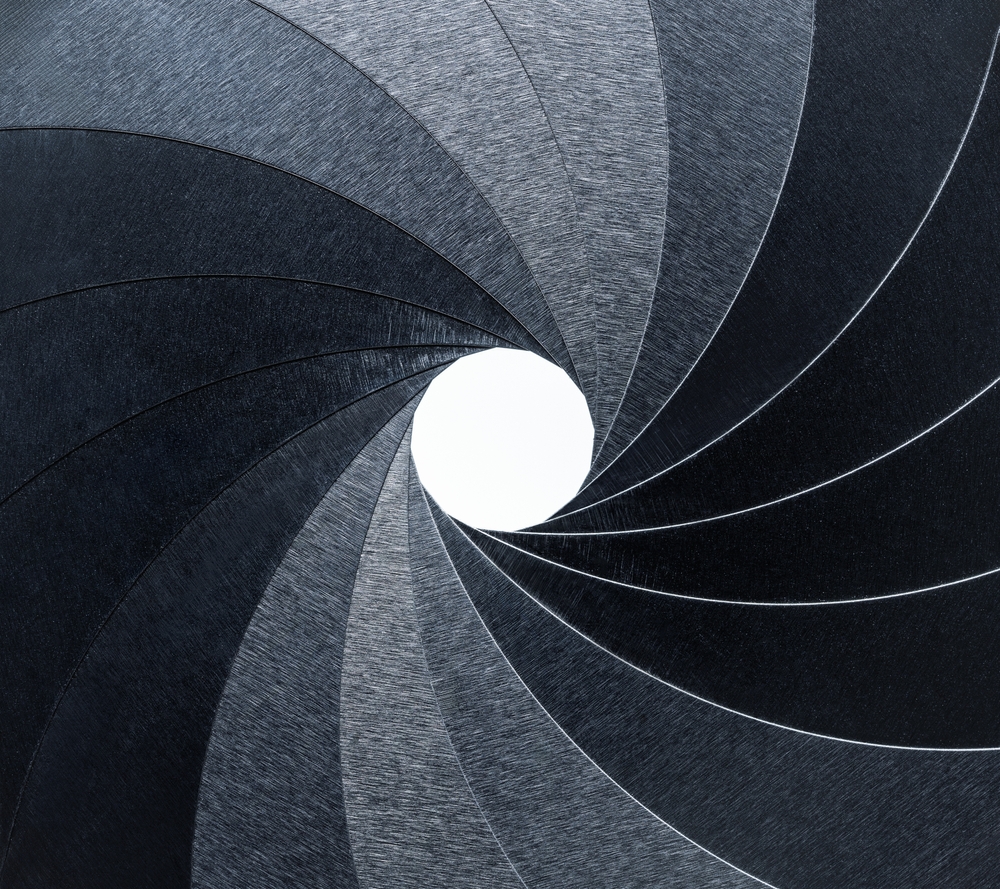
Photo by rangizzz via Shutterstock
Aperture is the opening in the lens that allows light to enter the camera. It’s measured in f-stops, with a lower number indicating a larger opening and a higher number indicating a smaller opening.
Aperture also affects the depth of field in your photo.
A wide aperture (low f-stop number) creates a shallow depth of field, with only the subject in focus and the background blurred, as shown in the image below.

Photo by dotshock via Shutterstock
A narrow aperture (high f-stop number) creates a deep depth of field, with everything in focus from the foreground to the background, as shown below.
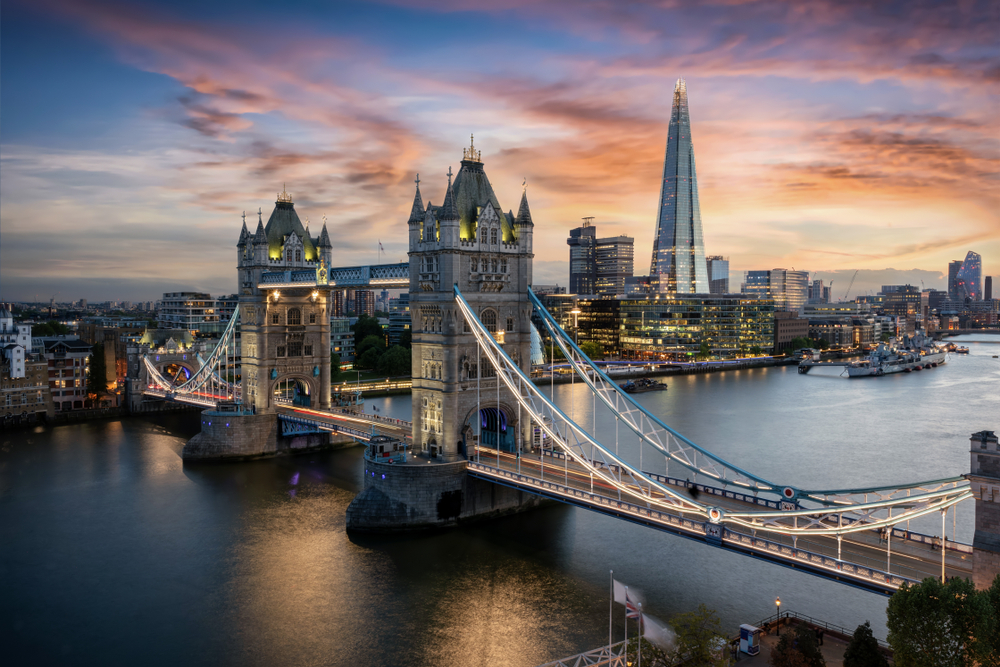
Photo by Sven Hansche via Shutterstock
When shooting in manual mode, you’ll need to adjust your aperture based on the lighting and the effect you want to achieve. A wider aperture is ideal for low-light situations, while a narrow aperture is good for landscape photography or when you want everything in focus.
How to Shoot in Manual Mode: Understanding Shutter Speed
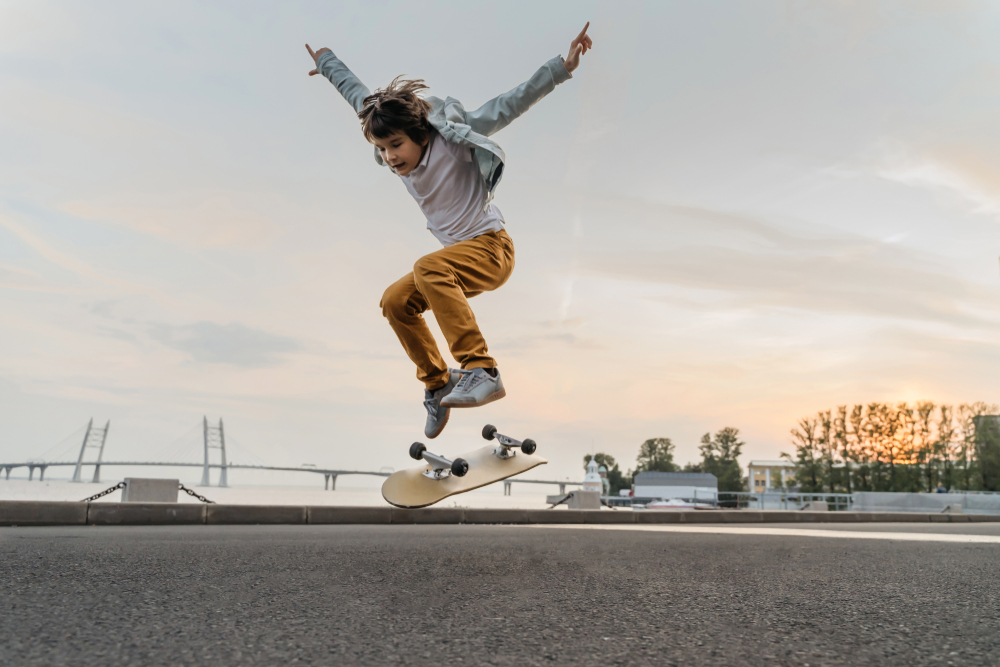
Photo by Arsenii Palivoda via Shutterstock
Now, shutter speed is the amount of time the shutter remains open. It’s measured in seconds or fractions of a second.
Shutter speed is important for capturing motion in your photos. A fast shutter speed (1/500th of a second or faster) is ideal for freezing motion (as shown above), while a slower shutter speed (1/30th of a second or slower) is good for capturing motion blur or creating a sense of movement in your photo (as shown below). You can also use a slow shutter speed to blur the movement of clouds, rivers, and even people or animals if the shutter speed is slow enough.
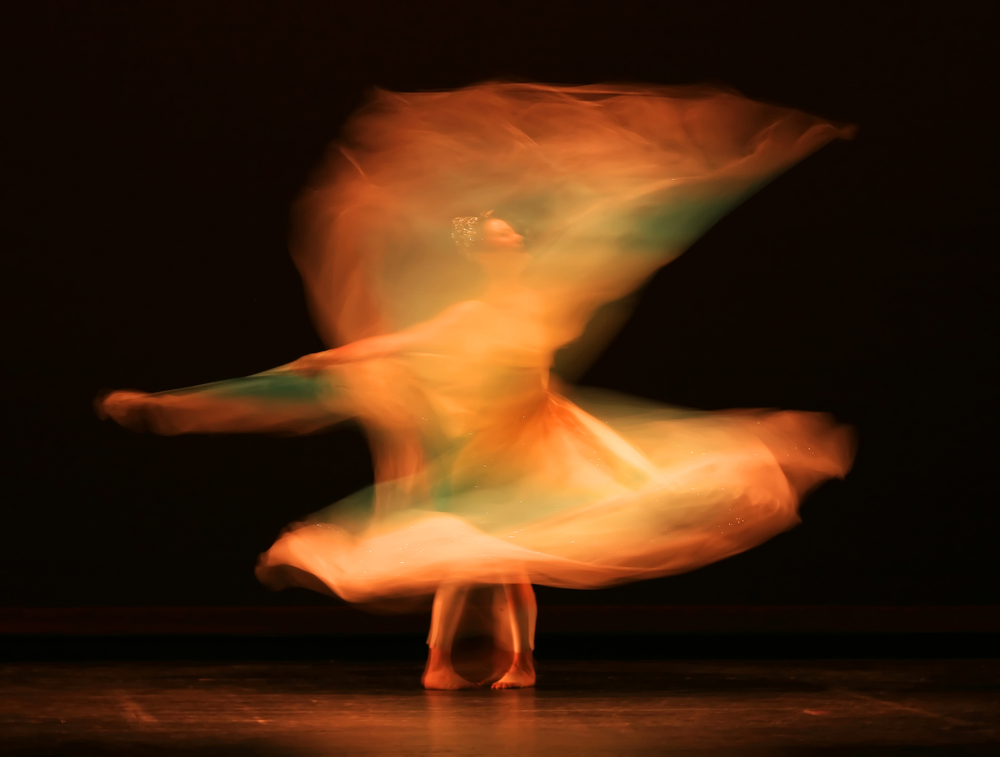
Photo by gary718 via Shutterstock
And here’s a fun tidbit – if you want to try something fun, slow the shutter down enough, and you can make people disappear. Think about that next time you’re in a crowded tourist area!
When shooting in manual mode, you’ll need to adjust your shutter speed depending on the motion in your scene and the effect you want to achieve. Crank up the shutter speed to freeze motion, and slow it down to get dreamy motion blur.
How to Shoot in Manual Mode: Understanding ISO
Last but not least is ISO, which controls the sensitivity of the camera’s sensor to light. A higher ISO number indicates a more sensitive sensor, while a lower ISO number indicates a less sensitive sensor. While a higher ISO can help you get a properly exposed photo in low-light situations, it can also introduce noise (graininess) into your photo. As you can see in the photo above, the photo taken at ISO 12800 has much more grain than the one taken at ISO 64.
When shooting in manual mode, you’ll need to balance the ISO with the aperture and shutter speed to get a properly exposed photo without introducing too much noise. Again, this is a delicate balance to achieve. And while it might be a little overwhelming at first, with lots of practice, you’ll find the rhythm needed to balance each element of the exposure triangle.
Practice, Practice, Practice!
Photo by FREEPIK2 via Shutterstock
Now that we’ve covered the basics of shooting in manual mode, it’s time to practice… go back and watch the video at the beginning of this article, pause at each lesson, and practice each lesson.
Then once you have done each of the lessons outlined in this video, take your camera out and start experimenting with different settings to get even more practice! Practice in different lighting situations and with different subjects. Don’t be afraid to make mistakes – that’s how you learn!
As you practice, you’ll start to develop a better understanding of how the exposure triangle works and how to get the results you want. It will take time, but the journey you’ll take will be so valuable! You’ll emerge with improved photography skills, better know-how, and better photos, too!
Just so you know, some of the cool stuff we mention comes with affiliate links, meaning we earn a commission if you buy (no extra charge to you!). Plus, we occasionally feature sponsored content, but rest assured, we only shout out products we genuinely stand behind.