
A Beginner's Guide on How to Photograph Birds
- See the Beauty of Nature in These 20 Incredible Bird Photos
- These Bird Photography Tips Will Take Your Photos to the Next Level
If you ask me, bird photography is one of the toughest types of photography to master.
After all, your subject could move at any time - and move very quickly at that.
It takes a lot of time, practice, and patience to take beautiful photographs of birds, but with these tips, you'll learn the basics how to photograph birds.
Editor's Note: The example images used in this article are by our friend Paul Rossi, and are used with permission.
Isolate the Subject in the Frame
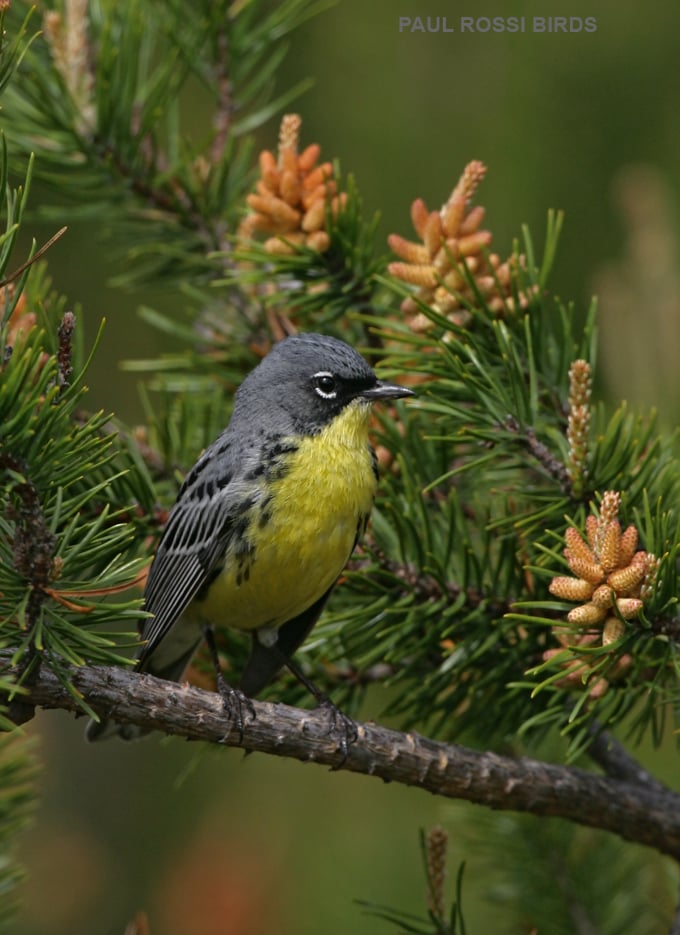
If you think about where birds usually hang out - amongst grasses and tree branches - there's a lot going on.
Not only do you have to deal with the light and shadows inherent in such locations, but you also have lots of colors, textures, and angles to deal with.
To get around this, strive to isolate your subject in the frame, as shown above.
In this shot, by restricting our view to just the one branch of the tree, Paul eliminates all those elements that could result in the bird getting lost in the shot. Using a wider aperture to help blur the background also helps make this little Kirtland's Warbler stand out.
Learn More:
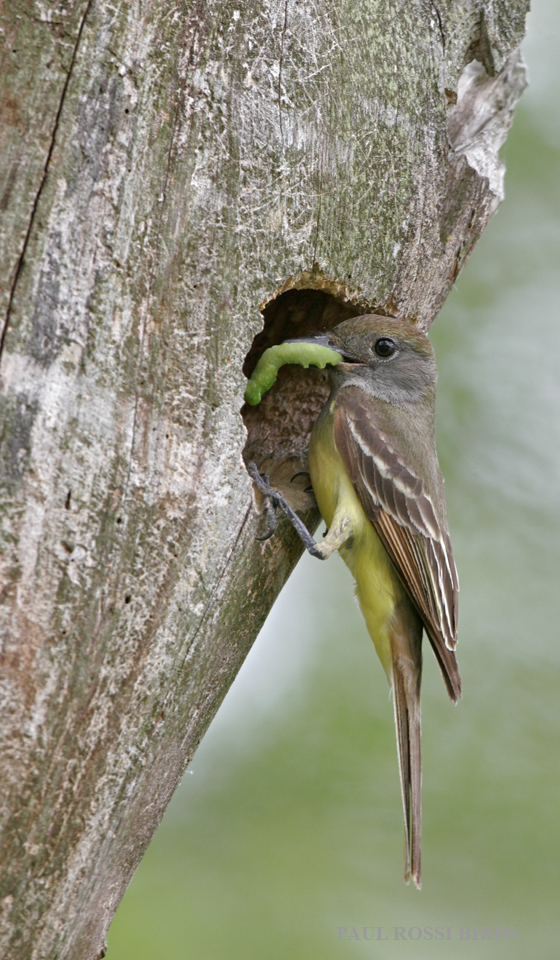
Study Your Subject
As noted earlier, one of the biggest challenges of bird photography is getting a clear, focused, and well-composed shot of an animal that's often skittish and can get away quite quickly.
To overcome this obstacle, planning your photo shoots is a crucial step.
Not only do you need to be at the right place at the right time in order to find the subjects you wish to photograph, but you also need to learn about the birds and what their behavior is like.
This will enable you to anticipate what the bird will do and where, and if you're there ahead of time ready to press the shutter, you can get more bird photos - and higher quality ones at that.
Work as Hard for the Background as You Do For the Bird
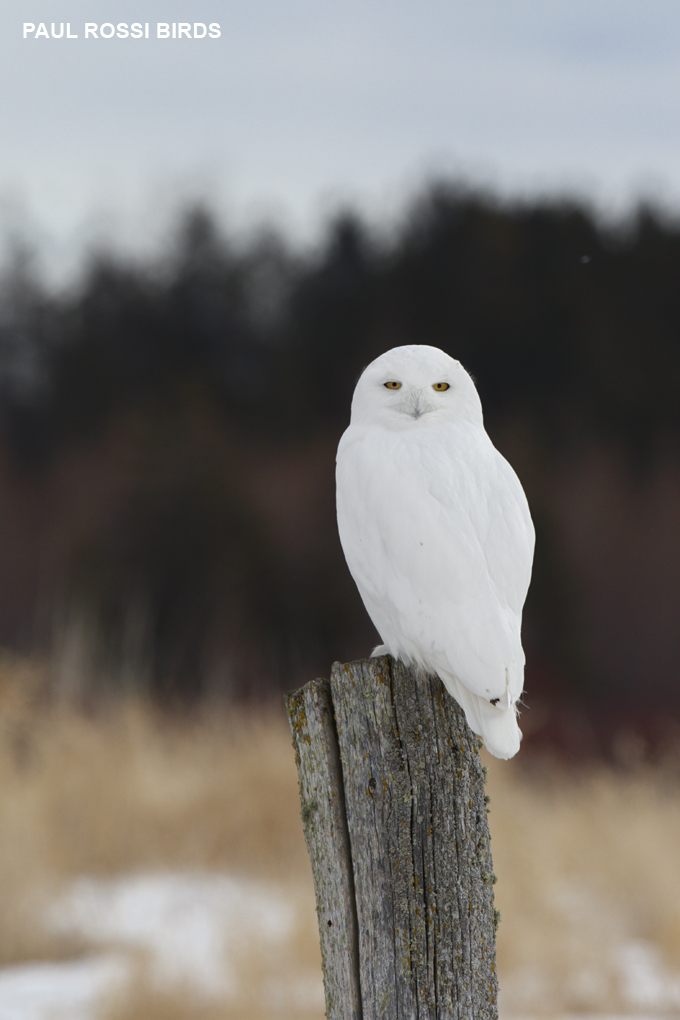
When you're just starting out taking photos of birds, it's hard not to focus so intently on them that you forget about other elements in the shot that can make or break how the image turns out.
The background is one such element...
Even if you get a perfectly-timed photo of a bird taking flight, if the background is distracting, the image won't be as successful as it could be.
That means that you have to work to find the best background for your photos.
This involves changing the angle from which you shoot, considering the direction of the sunlight entering the scene, and thinking about how the bird's size and coloration works with whatever is behind it in the shot.
In the image above, you can see how working the background such that the dark trees are behind this Snowy Owl helps set this majestic bird apart in this photo.
Learn More:
Shoot in Aperture Priority Mode
Eventually, you want to get to the point at which you're comfortable shooting in manual mode.
But if you aren't there yet, the next best thing is to use aperture priority mode for bird photography.
In aperture priority mode, you control the aperture and ISO while the camera selects a shutter speed to match for a well-exposed image.
This is advantageous for many shooting situations, including when the bird is still and when it's moving in front of backgrounds that have the same tones.
Constantly Check Your Exposure Settings
Even in aperture priority mode, you still need to regularly check your exposure settings.
This is particularly true if the bird moves from an area that's lit by the sun to one that's in the shadows.
Heck, even a few clouds in the sky can impact the light conditions as you shoot.
The last thing you want is to get home and find that all your photos are overexposed or underexposed, so check your exposure settings and make adjustments as necessary for the best results.